MCP vscode 연동Connecting VS Code with MCP
vscode 1.99버전 MCP 업데이트! vscode에서 PostgreSQL 연동해보기MCP arrives in VS Code 1.99! Connecting PostgreSQL from VS Code

vscode 1.99
드디어 2025년 4월 4일에 vscode 1.99 버전이 정식 릴리즈됐습니다. vscode에서도 에이전트(Agent) 모드가 추가되었으며, MCP(Model Context Protocol)를 연동할 수 있게 됐습니다. 그럼 바로 vscode에서 에이전트 모드를 활성화하고 MCP를 통해 PostgreSQL을 연동해보도록 하겠습니다!
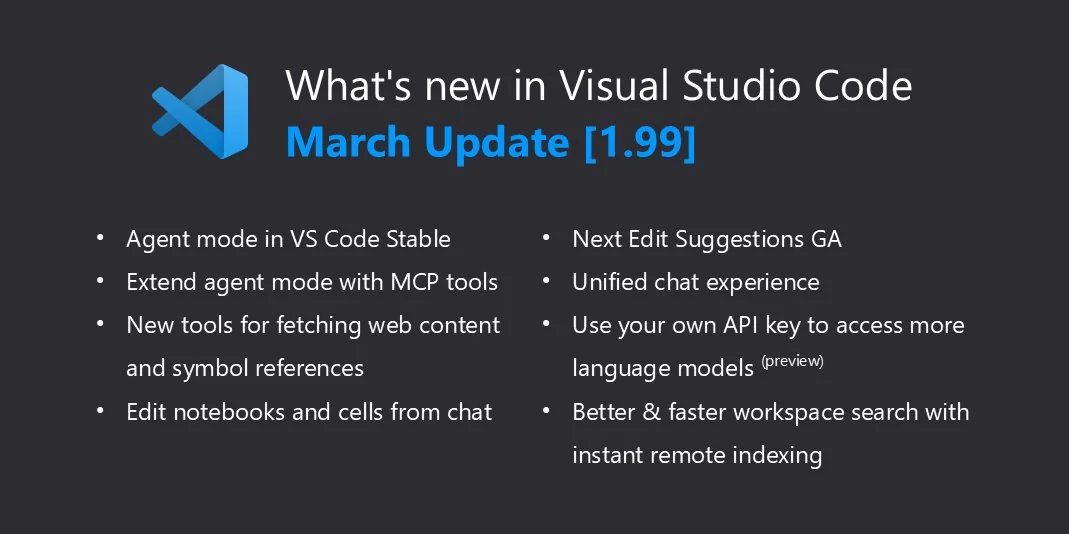
> 출처 : reddit.com - March 2025 (version 1.99)
vscode 설치
Download vscode 페이지에서 운영체제에 알맞은 vscode 설치 파일을 다운받아 설치합니다. 반드시 설치된 버전이 1.99 버전 이상인지 확인합시다!

> vscode 메뉴 : Help - About 에서 현재 버전을 확인할 수 있다.
vscode 에이전트(Agent) 모드
기존의 Chat 뷰와 Copilot Edits 뷰가 하나로 통합되었습니다. 그리고 기존의 코파일럿(Copilot)에서는 두 가지 모드를 지원했으면, 이번 업데이트로 Agent 모드가 추가되었습니다.
- Ask: 일반적인 질문
- Edit: 여러 파일 편집 가능
- Agent: 자율적인 도구 사용 및 작업 수행
에이전트(Agent) 모드 활성화
vscode 설치 시, 에이전트 모드는 기본적으로 비활성 상태입니다. 가장 먼저 에이전트 모드를 활성화합니다. ctrl + , 단축키 또는 메뉴창에서 File - Preference - Settings를 클릭합니다. 그리고 검색창에 agent라고 입력 합니다. Chat > Agent: Enabled 항목을 체크해서 에이전트 모드를 활성시킵니다.
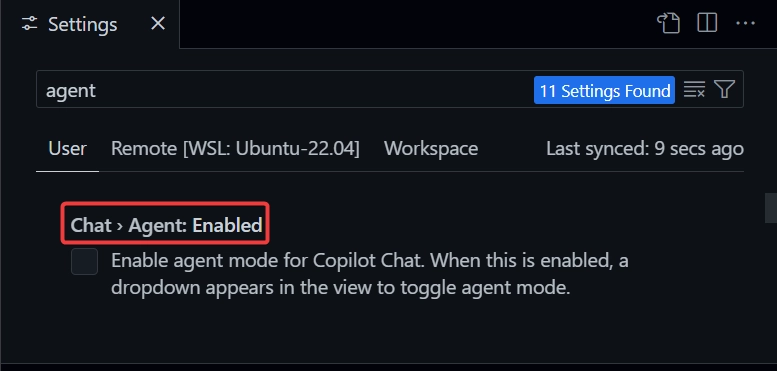
> 기본적으로 Agent 모드는 비활성되어 있으니, 꼭 활성화 해주자!
그럼 이제 코파일럿 창 하단에 Agent 모드가 추가된 것을 확인할 수 있습니다. 모드를 Agent로 선택해주시고, 본격적으로 에이전트는 어떤 기능이 있는지 살펴 봅시다!
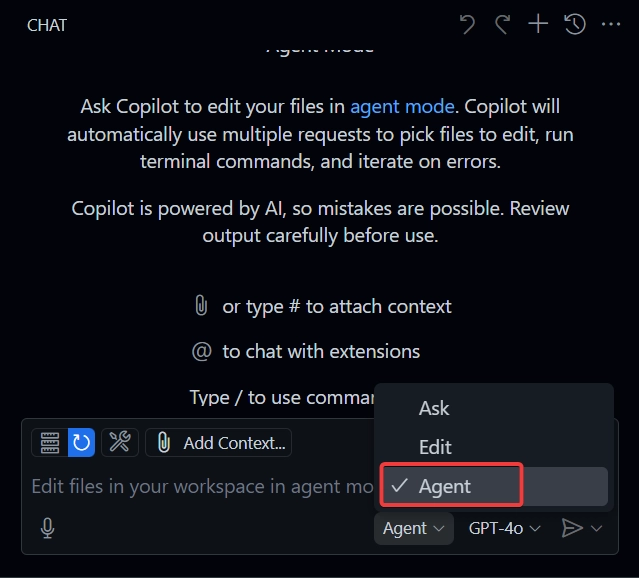
> 코파일럿에서 Agent 모드를 선택하자!
컨텍스트 도구 (#)
채팅창에서 #으로 다양한 컨텍스트(Context)를 추가할 수 있습니다. 예를 들어 인터넷에 있는 최신화된 문서를 코파일럿에게 손쉽게 전달할 수 있습니다.
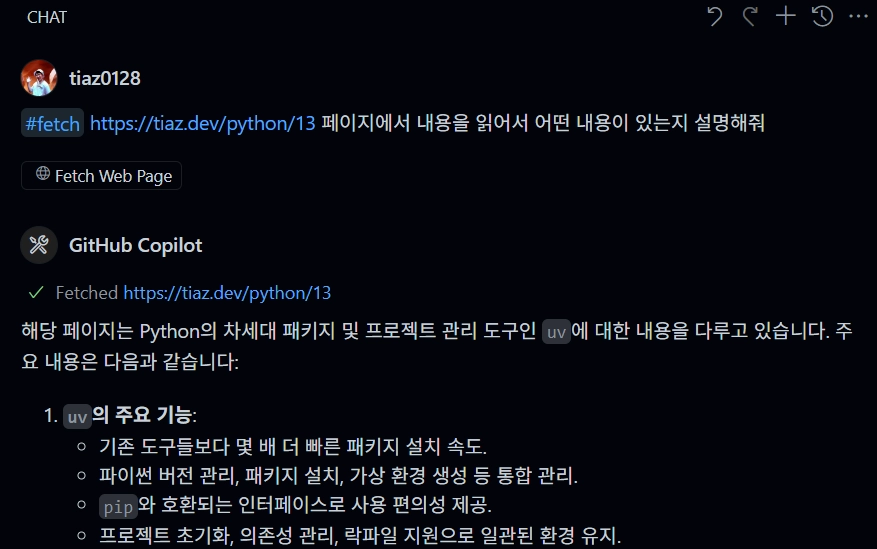
> # 으로 원하는 컨텍스트를 추가해줄수 있다!
vscode 1.99 업데이트에서 # 기호를 사용하여 다양한 컨텍스트를 챗에 추가할 수 있는 기능이 강화되었습니다. 릴리스 노트에서 언급된 주요 컨텍스트 도구들은 다음과 같습니다.
1. #fetch
- 공개적으로 접근 가능한 웹페이지 내용을 가져와 프롬프트에 포함시킬 수 있음
- 최신화된 공식문서를 손쉽게 AI에게 전달 가능
2. #usages
- “Find All References”, “Find Implementation”, “Go to Definition” 기능을 결합한 도구
- 함수, 클래스, 인터페이스에 대한 참조 및 구현을 찾을 수 있음
- 리팩토링 시 변경이 필요한 모든 위치를 찾는 데 유용
3. #codebase
- 코드베이스 전체를 컨텍스트로 추가하여 AI가 코드 전체를 이해하게 함
- Edit 모드에서 파일을 자동으로 찾아 편집할 때 특히 유용
4. #searchResults
- 검색 결과를 컨텍스트로 추가
- AI가 검색 결과를 요약하거나 설명하도록 요청 가능
- 검색 결과를 기반으로 코드 생성 가능
릴리스 노트에서는 또한 일반적으로 #를 사용하여 “모든 종류의 컨텍스트를 수동으로 첨부”할 수 있다고 언급하고 있습니다. Add Context 버튼을 통해서도 다양한 종류의 컨텍스트(스크린샷, 코드 스니펫, 에러 메시지, 로그 등)를 AI와의 대화에 추가할 수 있습니다.
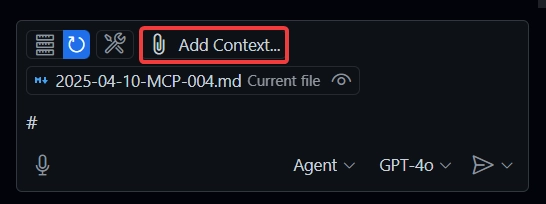
> Add Context 버튼으로도 컨텍스트를 추가할 수 있다.
vscode MCP
드디어 vscode에서도 MCP를 공식 지원합니다. MCP 서버를 추가하는 방법은 간단합니다.
-
Select Tools버튼 클릭 - 또는 명령어 팔렛트를 사용, 단축키
ctrl + shift + p-> MCP: Add Server검색 - 또는
.vscode/mcp.json파일 작성
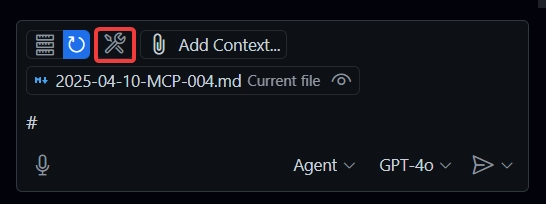
> Select Tools 버튼으로 MCP 서버를 추가하자
다양한 MCP 서버 타입이 나오는 것을 알수 있습니다. 설치하는 MCP 서버에 알맞은 타입을 선택하면 됩니다. 여기서는 mcp.json 파일을 통해서 MCP 서버를 설정하는 방법으로 진행하겠습니다.
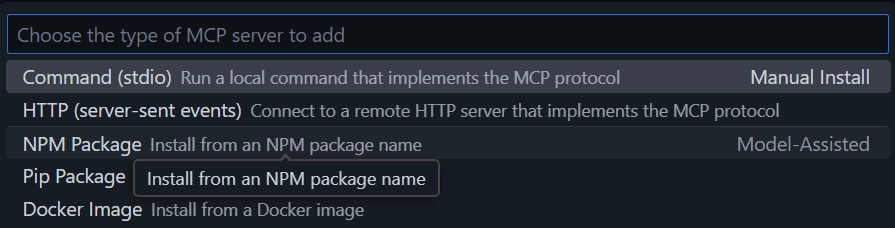
> 설치하는 MCP 서버에 알맞은 타입을 선택하자
PostgreSQL 연동
테스트 PostgreSQL 구동
테스트용으로 사용할 PostgreSQL을 구동시키겠습니다. 아래의 명령으로 컨테이너를 구동시켜 줍니다. docker ps 명령으로 제대로 동작 중인지도 확인합시다!
$ docker run --name postgres-test \
  -e POSTGRES_USER=testuser \
  -e POSTGRES_PASSWORD=testpassword \
  -e POSTGRES_DB=testdb \
  -p 5432:5432 \
  -d \
  postgres
$ docker ps
mcp.so
mcp.so는 MCP 서버를 모아둔 사이트 입니다. 다양한 MCP 서버가 있으니 필요한 MCP 서버를 찾아서 사용해 보세요! 여기서는 PostgreSQL을 MCP로 연결해 보겠습니다.
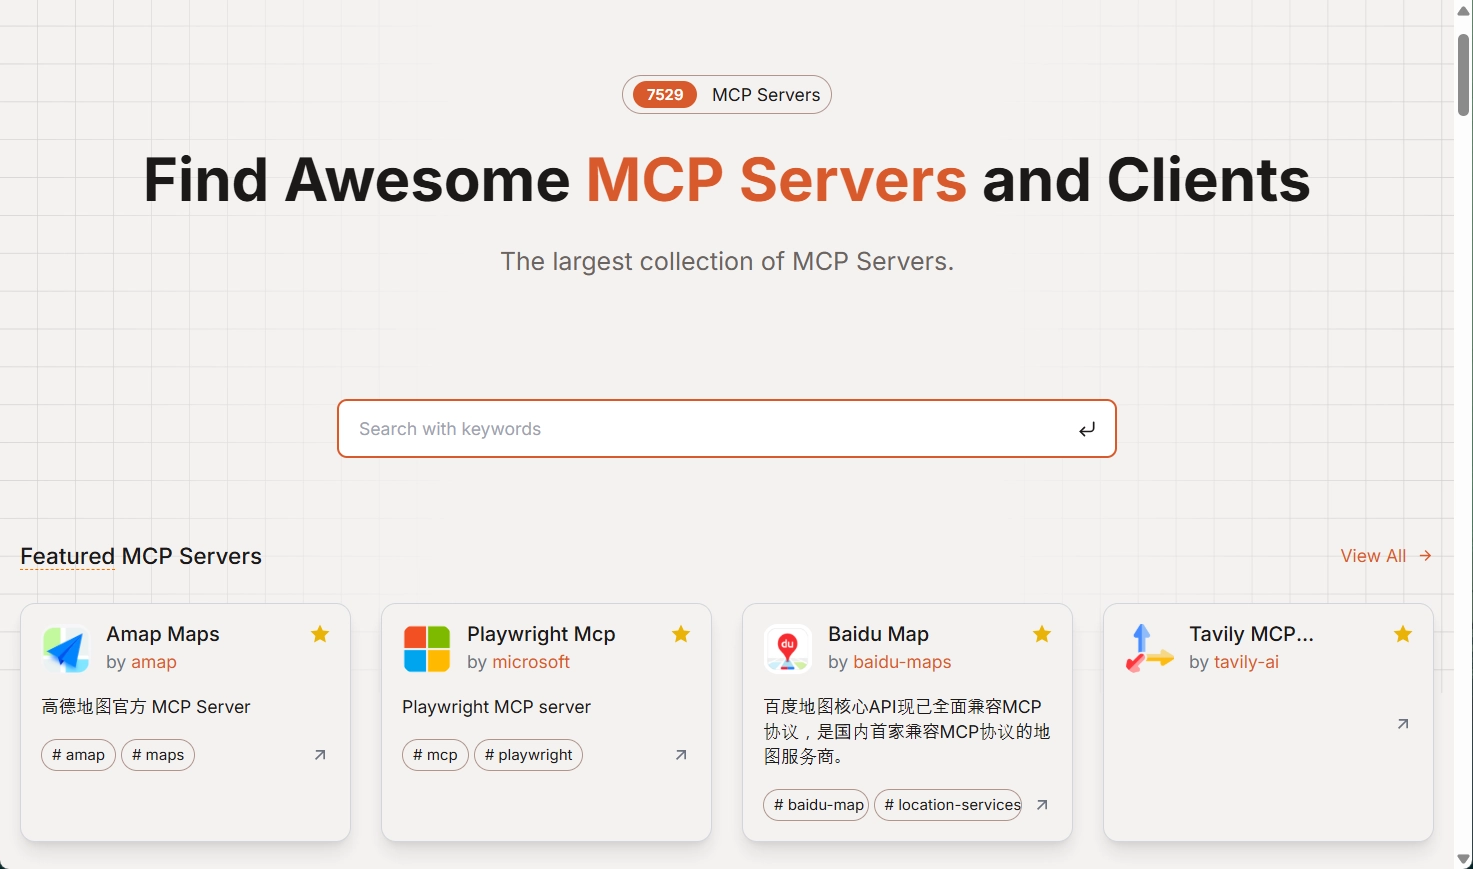
> mcp.so에서 원하는 MCP 서버를 찾아보자!
PostgreSQL을 검색하고 선택하면, Content 탭에서 해당 MCP 서버를 구동하는 여러가지 방법을 확인할 수 있습니다.
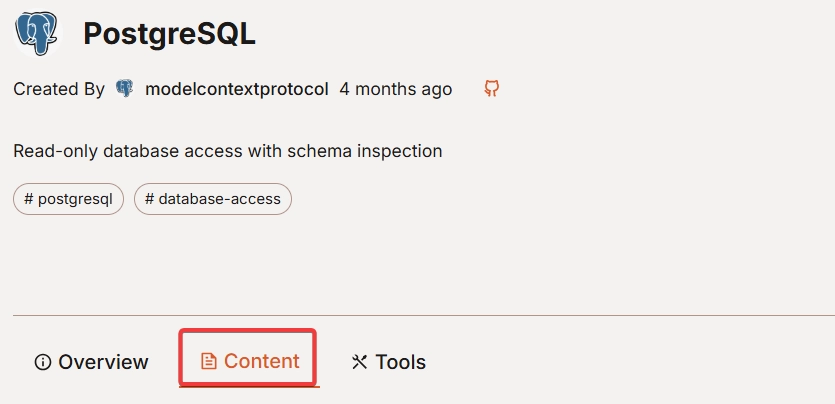
> mcp.so에서 원하는 MCP 서버를 찾아보자!
여기서는 Docker로 MCP 서버를 구동시키겠습니다. Docker로 MCP 서버를 동작시키는 내용을 참고해 vscode에 MCP 서버를 세팅해보겠습니다.
mcp.json 작성
.vscode 폴더에 mcp.json파일을 생성하고 아래와 같이 내용을 붙여넣습니다. 필요에 따라서 Docker 옵션과 자신에게 맞는 서버주소와 아이디, 패스워드를 입력합시다.
{
  "servers": {
      "postgres": {
          "command": "docker",
          "args": [
            "run",
            "-i",
            "--rm",
            "--network=host",
            "mcp/postgres",
            "postgresql://localhost:5432/testdb?user=testuser&password=testpassword"
          ]
      }
  }
}
MCP 서버 구동 확인
vscode에서 MCP 서버를 동작시키면, Select Tools 버튼에 숫자가 표시되는 것을 알수 있습니다. 추가한 MCP 서버를 통해 코파일럿 AI가 #query라는 도구를 사용할 수 있게 됐습니다! 필요에 따라서 다른 MCP 서버와 툴을 추가하고 해제할 수 있습니다.

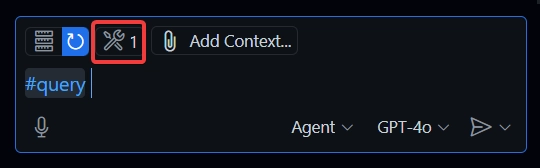
> vscode에서 MCP 서버가 구동되는것을 확인할 수 있다!
질의 해보기
추가된 도구는 vscode 코파일럿에서 # 컨텍스트 명령어로 사용 가능합니다. #query로 AI를 통해서 데이터베이스에 접근 가능한지 질의를 해봅시다.
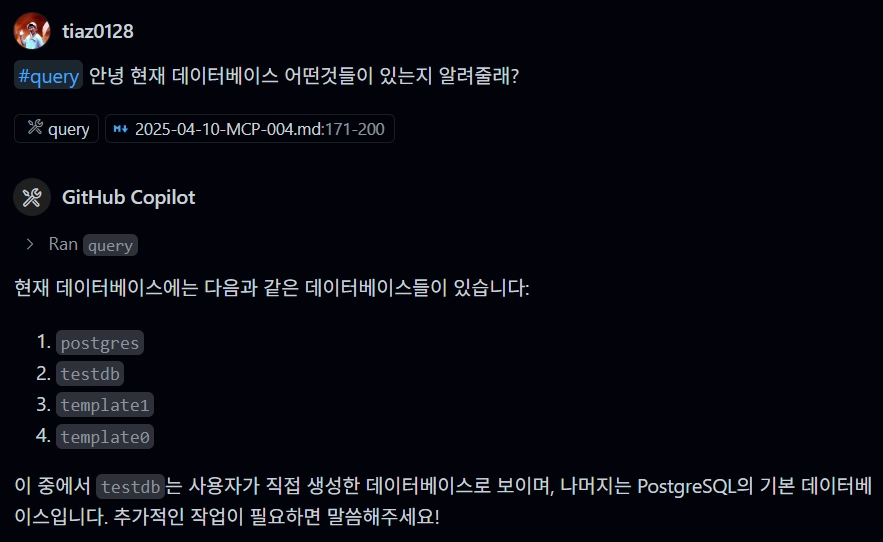
> MCP로 연결된 PostgreSQL!
마무리
이번 포스팅에서는 vscode 1.99 버전에서 새롭게 추가된 에이전트 모드와 MCP 연동 기능을 살펴보았습니다. 그리고 PostgreSQL과 MCP를 연동하여 AI가 데이터베이스에 직접 접근할 수 있는 환경을 구성해보았습니다.
앞으로 다양한 MCP 서버들이 개발되고 플러그인 형태로 출시될 것으로 보입니다. 여러분도 다양한 MCP 서버를 찾아보고 자신의 개발 환경에 맞게 활용해보시기 바랍니다. 하지만 항상 보안에는 주의하세요!
감사합니다! 😊
참고 문헌
VS Code 1.99
VS Code 1.99 was finally released on April 4, 2025. VS Code now has an Agent mode, and it can connect to MCP (Model Context Protocol). So let’s jump right in: enable Agent mode in VS Code and connect PostgreSQL through MCP!
> Source: reddit.com - March 2025 (version 1.99)
Installing VS Code
Download the VS Code installer for your OS from the Download vscode page and install it. Make sure the installed version is 1.99 or later!
> You can check your current version under the VS Code menu: Help - About.
VS Code Agent Mode
The old Chat view and Copilot Edits view have been merged into one. Copilot used to support two modes, and this update adds an Agent mode.
- Ask: general questions
- Edit: can edit multiple files
- Agent: uses tools and carries out tasks autonomously
Enabling Agent Mode
When you install VS Code, Agent mode is disabled by default, so the first step is to enable it. Press ctrl + , or click File - Preference - Settings in the menu. Then type agent in the search box and check Chat > Agent: Enabled to turn on Agent mode.
> Agent mode is disabled by default, so be sure to enable it!
Now you’ll see that Agent mode has been added at the bottom of the Copilot panel. Select Agent as the mode, and let’s take a proper look at what the agent can do!
> Select Agent mode in Copilot!
Context Tools (#)
In the chat box, you can add all sorts of context with #. For example, you can easily hand Copilot an up-to-date document from the web.
> You can add whatever context you want with #!
The VS Code 1.99 update strengthened the ability to add various kinds of context to the chat using the # symbol. The main context tools mentioned in the release notes are as follows.
1. #fetch
- Fetches the content of a publicly accessible web page and includes it in the prompt
- Makes it easy to hand the AI the latest official docs
2. #usages
- A tool that combines “Find All References”, “Find Implementation” and “Go to Definition”
- Finds references to and implementations of functions, classes and interfaces
- Handy for finding every place that needs to change during a refactor
3. #codebase
- Adds the entire codebase as context so the AI understands the code as a whole
- Especially useful in Edit mode, when files are found and edited automatically
4. #searchResults
- Adds search results as context
- You can ask the AI to summarize or explain the search results
- Can generate code based on the search results
The release notes also mention that, in general, you can use # to “manually attach all kinds of context”. Through the Add Context button, too, you can add many kinds of context (screenshots, code snippets, error messages, logs, etc.) to your conversation with the AI.
> You can also add context with the Add Context button.
VS Code MCP
VS Code finally supports MCP officially. Adding an MCP server is simple.
- Click the
Select Toolsbutton - Or use the Command Palette: press
ctrl + shift + pand search for> MCP: Add Server - Or write a
.vscode/mcp.jsonfile
> Add an MCP server with the Select Tools button
You’ll see a variety of MCP server types. Just pick the type that fits the MCP server you’re installing. Here, we’ll configure the MCP server through an mcp.json file.
> Pick the type that fits the MCP server you're installing
Connecting PostgreSQL
Running a Test PostgreSQL
Let’s spin up a PostgreSQL instance for testing. Start the container with the command below, and check with docker ps that it’s running properly!
$ docker run --name postgres-test \
  -e POSTGRES_USER=testuser \
  -e POSTGRES_PASSWORD=testpassword \
  -e POSTGRES_DB=testdb \
  -p 5432:5432 \
  -d \
  postgres
$ docker ps
mcp.so
mcp.so is a site that collects MCP servers. There are lots of them, so find the ones you need and give them a try! Here we’ll connect PostgreSQL via MCP.
> Find the MCP server you want on mcp.so!
Search for PostgreSQL and select it, and the Content tab shows several ways to run that MCP server.
> Find the MCP server you want on mcp.so!
Here we’ll run the MCP server with Docker. Using the instructions for running the MCP server with Docker, let’s set it up in VS Code.
Writing mcp.json
Create an mcp.json file in the .vscode folder and paste in the content below. Adjust the Docker options as needed, and enter your own server address, username and password.
{
  "servers": {
      "postgres": {
          "command": "docker",
          "args": [
            "run",
            "-i",
            "--rm",
            "--network=host",
            "mcp/postgres",
            "postgresql://localhost:5432/testdb?user=testuser&password=testpassword"
          ]
      }
  }
}
Checking That the MCP Server Is Running
When you start the MCP server in VS Code, a number appears on the Select Tools button. Thanks to the MCP server we added, the Copilot AI can now use a tool called #query! You can add or remove other MCP servers and tools as needed.
> You can see the MCP server running in VS Code!
Asking Questions
The added tool can be used as a # context command in VS Code Copilot. Let’s use #query to ask whether the AI can access the database.
> PostgreSQL connected through MCP!
Wrapping Up
In this post, we looked at the new Agent mode and MCP integration in VS Code 1.99. We also connected PostgreSQL through MCP to set up an environment where the AI can access the database directly.
It looks like many more MCP servers will be developed and released as plugins. I hope you’ll explore different MCP servers and put them to use in your own development environment. But always be careful about security!
Thank you! 😊