Docker 배포 : 쉽게 시작하기Docker Deployment: Getting Started the Easy Way
Docker 수동 배포와 Watchtower를 이용한 자동 업데이트Manual Docker deployment and automatic updates with Watchtower

도커 배포
도커를 서버에 배포하는 방법을 알아보겠습니다.
- 수동 배포
- Watchtower
- AWS CodePipeline CI/CD 구축
Docker image 생성
API 코드
배포 할 API 서버 코드를 먼저 작성하겠습니다. FastAPI로 작성된 문자열을 반환하는 간단한 코드 입니다. run.py 파일에 코드를 작성하겠습니다.
project/
└── run.py (추가 파일)
from fastapi import FastAPI
from fastapi.responses import PlainTextResponse

app = FastAPI()

@app.get("/")
def health(response_class=PlainTextResponse):
    return "Hello Docker Container"
Dockerfile 작성
도커 이미지를 생성할 때 사용하는 Dockerfile을 작성하겠습니다.
project/
├── Dockerfile (추가 파일)
└── run.py
FROM python:3.12-alpine

RUN pip install "fastapi[standard]"

WORKDIR /app

COPY . .

EXPOSE 8000

CMD ["uvicorn", "run:app", "--host", "0.0.0.0", "--port", "8000"]
Docker image 빌드
작성한 도커 파일(Dockerfile)을 사용하여 이미지를 빌드합니다. 이때 해당 이미지에 대한 tag를 -t 옵션으로 부여하고, 이후 도커 허브에 이미지를 push 할 때 사용합니다.
$ docker build -t tiaz0128/fast-api .
docker.com 가입
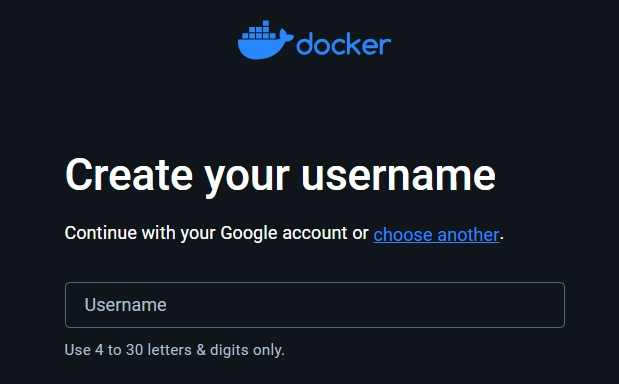
docker.com에 가입하고 로그인 합니다. 가입 할때 생성하는 Username은 도커 이미지를 저장하는 도커 허브(Docker Hub)에 사용 됩니다.
> GitHub와 유사한 형태의 Docker Hub
Docker Hub : 이미지 push
Docker Hub는 빌드한 도커 이미지를 저장하는 레포지토리 입니다. repositories탭에서 Username을 네임스페이스로 하는 레포지토리를 생성합니다.
여기서는 Public 레포지토리를 fast-api라는 이름으로 만들도록 하겠습니다. 참고로 비결제 계정당 하나의 Private 레포지토리를 사용 할 수 있습니다.
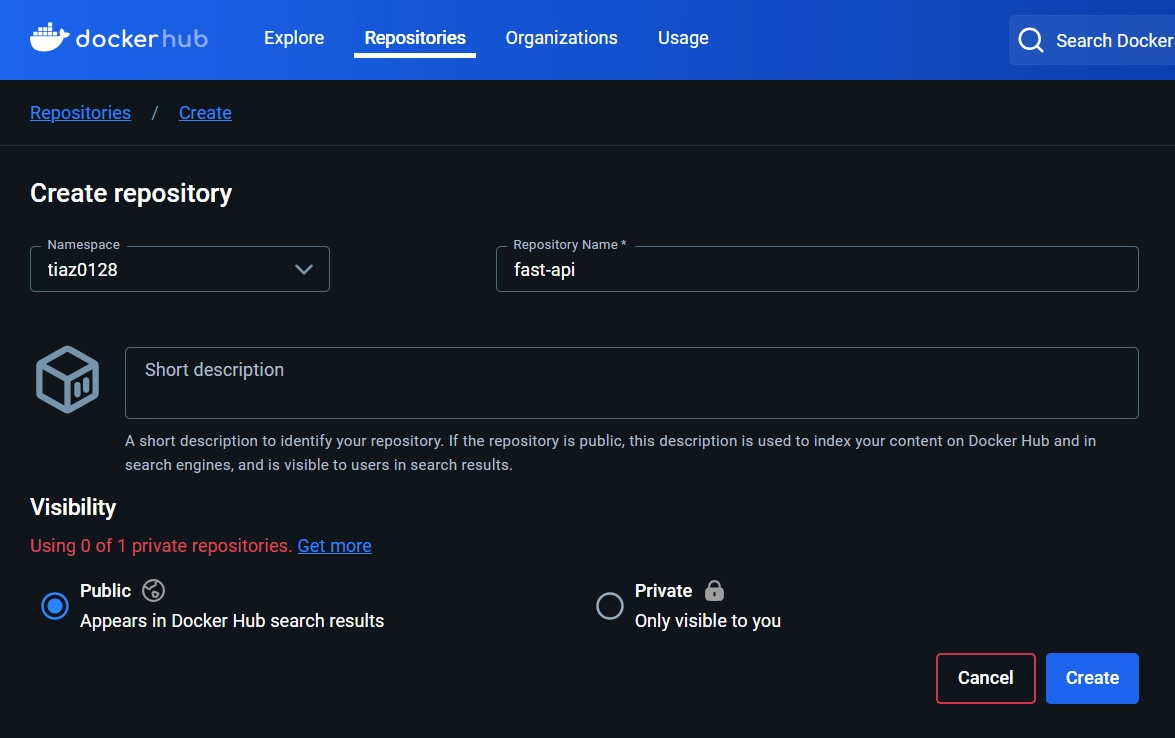
> Docker Hub : 이미지를 저장하는 원격 저장소
Docker login
빌드한 이미지를 도커 허브에 push 하겠습니다. docker.io에 등록한 이메일이나 Username으로 로그인 가능합니다.
$ docker login docerk.io

Username: tiaz0128.dev@gmail.com
Password: ****

Login Succeeded
빌드한 이미지 push
이미지를 Docker Hub에 push 하기 위해서는 docker.io에서 등록된 Username과 repository 이름을 기반으로 push 할 수 있습니다.
Docker Hub를 사용할 때는 일반적으로 Username/repository 형식을 따라야 합니다.
이는 Docker Hub가 사용자별로 네임스페이스를 관리하기 때문입니다.
$ docker push <Username>/<repository>[:tag]

$ docker push tiaz0128/fast-api
Docker tag
tag 명령어는 도커 이미지에 태그를 추가하거나 변경하는 데 사용됩니다. 기본 사용법은 다음과 같습니다.
$ docker tag SOURCE_IMAGE[:TAG] TARGET_IMAGE[:TAG]

$ docker tag fast-api:1.0 tiaz0128/fast-api
-
SOURCE_IMAGE: 태그를 변경하려는 원본 이미지의 이름과 태그 -
TARGET_IMAGE: 새로 지정할 이미지 이름과 태그 -
[:TAG]: 선택사항, 특정 태그를 지정. 생략하면 기본값으로 latest 적용
Docker 수동 배포
어떤 환경이던 서버 환경이든 상관없습니다. 여기서는 Amazon EC2(Amazon Linux 2023 AMI)에서 진행했습니다.
Docker 설치
가장 먼저 서버에 도커를 설치합니다.
$ sudo yum update -y

$ sudo yum -y install docker
데몬 & 권한 추가
설치 후에는 데몬을 실행합니다. 필요시 사용자 그룹 권한을 수정 해줍니다. 사용자(ec2-user)를 docker 그룹에 추가합니다. 이를 통해 sudo 없이 docker 명령어를 실행할 수 있게 됩니다.
$ sudo systemctl restart docker

$ sudo usermod -a -G docker ec2-user
Docker pull
도커 허브에 로그인 하고 빌드 한 이미지를 pull 받습니다.
$ docker login docerk.io

Username: tiaz0128.dev@gmail.com
Password: ****

Login Succeeded
$ docker pull tiaz0128/fast-api
Docker run & stop
pull 받은 이미지로 컨테이너를 실행합니다. 실행 중인 컨테이너가 있다면 정지 후, 새로운 컨네이터를 실행하는 방식으로 수동으로 배포가 가능합니다.
$ docker run -it -d --name fast-api --rm tiaz0128/fast-api
수동 배포의 문제점
여기까지 수동으로 도커 컨테이너를 배포해보았습니다. 그렇다면 여기서 이런 생각이 듭니다.
코드가 수정되고 이미지가 새로 만들어지면 어떻게 하지?
앞서 했던 것처럼 매번 수동으로 이미지를 pull 받고 컨테이터를 재시작해야 할 것입니다.
이런 문제를 해결하기 위한 여러가지 방법이 있지만, 여기서는 간단한 Watchtower를 사용해 보겠습니다.
Watchtower

Watchtower는 정기적으로 이미지 업데이트를 확인하고, 새 버전이 있으면 자동으로 컨테이너를 업데이트합니다. Watchtower 컨테이너를 실행 시켜 놓기만 하면 이미지를 가져와서 기존 컨테이너를 정상적으로 종료한 후, 처음 배포될 때 사용한 동일 옵션으로 재시작합니다.
Watchtower 기본 사용법
아래의 명령을 통해 EC2 내부에 동작 중인 fast-api라는 컨테이너를 모니터링 합니다. 여러개 컨테이너를 한번에 모니터링 또한 가능 합니다.
$ docker ps

CONTAINER ID   IMAGE                        NAMES
dad54e31fb2b   tiaz0128/fast-api:latest     fast-api
$ docker run -d \
  --name watchtower \
  -v /var/run/docker.sock:/var/run/docker.sock \
  containrrr/watchtower \
  fast-api
Watchtower 주요 옵션
-
--interval: 업데이트 확인 주기 설정. 초단위, default: 86400(24H) -
--schedule: 6개 필드 Cron 표현식 설정. --interval 중에 하나만 사용 가능 -
--run-once: 컨테이너 이름 목록에 대해 업데이트를 한 번만 시도하고 Watchtower 종료
마무리
빌드한 이미지를 도커 허브에 push 하고 빌드된 이미지를 Docker EC2에 처음에는 수동으로 배포해보고, Watchtower를 이용하여 자동으로 배포까지 해보았습니다.
Watchtower를 사용했지만 여전히 git 배포와 도커 이미지 배포를 각각 수행해야 하는 불편함이 남아있습니다. 이러한 문제를 해결 하기 위해 GitOps 라는 방법론이 등장 합니다.
이 방법론의 핵심 아이디어는 단일 진실 원천(single source of truth)으로 git 레포지토리를 모든 것의 기준점으로 삼는 것입니다.
> 따배 : [따배GitOps] 0. 강의 소개
다음으로
이제 git 배포와 도커 배포까지 한번에 해결할 수 있는 좀 더 나은 Docker 배포 방법을 알아보겠습니다! AWS CodePipeline CI/CD 구축 방법을 공부해 봅시다. 😊
참고 문헌
Deploying with Docker
Let’s look at how to deploy Docker to a server.
- Manual deployment
- Watchtower
- Building CI/CD with AWS CodePipeline
Creating a Docker Image
API Code
First, let’s write the API server code to deploy. It’s simple FastAPI code that returns a string. We’ll put it in run.py.
project/
└── run.py (new file)
from fastapi import FastAPI
from fastapi.responses import PlainTextResponse

app = FastAPI()

@app.get("/")
def health(response_class=PlainTextResponse):
    return "Hello Docker Container"
Writing the Dockerfile
Next, let’s write the Dockerfile used to build the Docker image.
project/
├── Dockerfile (new file)
└── run.py
FROM python:3.12-alpine

RUN pip install "fastapi[standard]"

WORKDIR /app

COPY . .

EXPOSE 8000

CMD ["uvicorn", "run:app", "--host", "0.0.0.0", "--port", "8000"]
Building the Docker Image
Build the image from the Dockerfile we wrote. The -t option gives the image a tag, which we’ll use later when pushing the image to Docker Hub.
$ docker build -t tiaz0128/fast-api .
Signing Up at docker.com
Sign up at docker.com and log in. The Username you create when signing up is used on Docker Hub (Docker Hub), where Docker images are stored.
> Docker Hub, which works a lot like GitHub
Docker Hub: Pushing the Image
Docker Hub is a repository for the Docker images you build. In the repositories tab, create a repository under your Username as the namespace.
Here we’ll create a Public repository named fast-api. For reference, each free account gets one Private repository.
> Docker Hub: a remote registry for images
Docker login
Let’s push the image we built to Docker Hub. You can log in with the email or Username you registered on docker.io.
$ docker login docerk.io

Username: tiaz0128.dev@gmail.com
Password: ****

Login Succeeded
Pushing the Built Image
To push an image to Docker Hub, you push it based on the Username registered on docker.io and the repository name.
On Docker Hub you generally have to follow the Username/repository format.
That’s because Docker Hub manages namespaces per user.
$ docker push <Username>/<repository>[:tag]

$ docker push tiaz0128/fast-api
Docker tag
The tag command adds or changes a tag on a Docker image. The basic usage is:
$ docker tag SOURCE_IMAGE[:TAG] TARGET_IMAGE[:TAG]

$ docker tag fast-api:1.0 tiaz0128/fast-api
-
SOURCE_IMAGE: the name and tag of the source image you want to retag -
TARGET_IMAGE: the new image name and tag -
[:TAG]: optional; specifies a tag. If omitted, the default latest is used
Manual Docker Deployment
Any server environment will do. Here I used Amazon EC2 (Amazon Linux 2023 AMI).
Installing Docker
First, install Docker on the server.
$ sudo yum update -y

$ sudo yum -y install docker
Daemon & Permissions
After installing, start the daemon. If needed, adjust the user’s group permissions: add the user (ec2-user) to the docker group. This lets you run docker commands without sudo.
$ sudo systemctl restart docker

$ sudo usermod -a -G docker ec2-user
Docker pull
Log in to Docker Hub and pull the image you built.
$ docker login docerk.io

Username: tiaz0128.dev@gmail.com
Password: ****

Login Succeeded
$ docker pull tiaz0128/fast-api
Docker run & stop
Run a container from the pulled image. If a container is already running, you can deploy manually by stopping it and starting a new one.
$ docker run -it -d --name fast-api --rm tiaz0128/fast-api
The Problem with Manual Deployment
So far we’ve deployed a Docker container by hand. At this point, a question comes to mind.
What happens when the code changes and a new image is built?
Just like before, we’d have to pull the image and restart the container by hand every single time.
There are several ways to solve this, but here we’ll try the simple Watchtower.
Watchtower
Watchtower periodically checks for image updates and, when a new version is available, updates the container automatically. Just keep a Watchtower container running: it pulls the image, gracefully shuts down the existing container, and restarts it with the same options it was originally deployed with.
Basic Watchtower Usage
The command below monitors the container named fast-api running on the EC2 instance. You can also monitor several containers at once.
$ docker ps

CONTAINER ID   IMAGE                        NAMES
dad54e31fb2b   tiaz0128/fast-api:latest     fast-api
$ docker run -d \
  --name watchtower \
  -v /var/run/docker.sock:/var/run/docker.sock \
  containrrr/watchtower \
  fast-api
Key Watchtower Options
-
--interval: how often to check for updates, in seconds. default: 86400 (24H) -
--schedule: a 6-field cron expression. Can’t be combined with --interval -
--run-once: tries to update the listed containers just once, then Watchtower exits
Wrapping Up
We pushed the built image to Docker Hub, deployed it to an EC2 instance with Docker, first by hand and then automatically with Watchtower.
Even with Watchtower, it’s still a hassle to deploy the git code and the Docker image separately. The methodology that emerged to solve this is GitOps.
Its core idea is to treat the git repository as the single source of truth (single source of truth), the reference point for everything.
> Ttabae: [Ttabae GitOps] 0. Course Introduction
What’s Next
Next, let’s look at a better way to deploy with Docker that handles both the git deployment and the Docker deployment in one go! Let’s learn how to go about Building CI/CD with AWS CodePipeline. 😊